
Through advanced filtration technology and high - quality materials, we ensure that our DPFs meet the most stringent environmental standards helping to improve air quality and protect the environment.
Through advanced filtration technology and high - quality materials, we ensure that our DPFs meet the most stringent environmental standards helping to improve air quality and protect the environment.

Installing a Diesel Particulate Filter (DPF) is more than replacing a metal canister.
A properly installed DPF protects the engine, supports emissions compliance, and prevents expensive downtime.
A poorly installed DPF can cause:
· Engine warning lights
· Exhaust leaks
· Failed regeneration
· High backpressure
· Premature filter failure
· Costly warranty claims
For fleets operating across North America and Canada, where trucks often travel long distances under varying temperatures, installation quality directly affects reliability and operating costs.
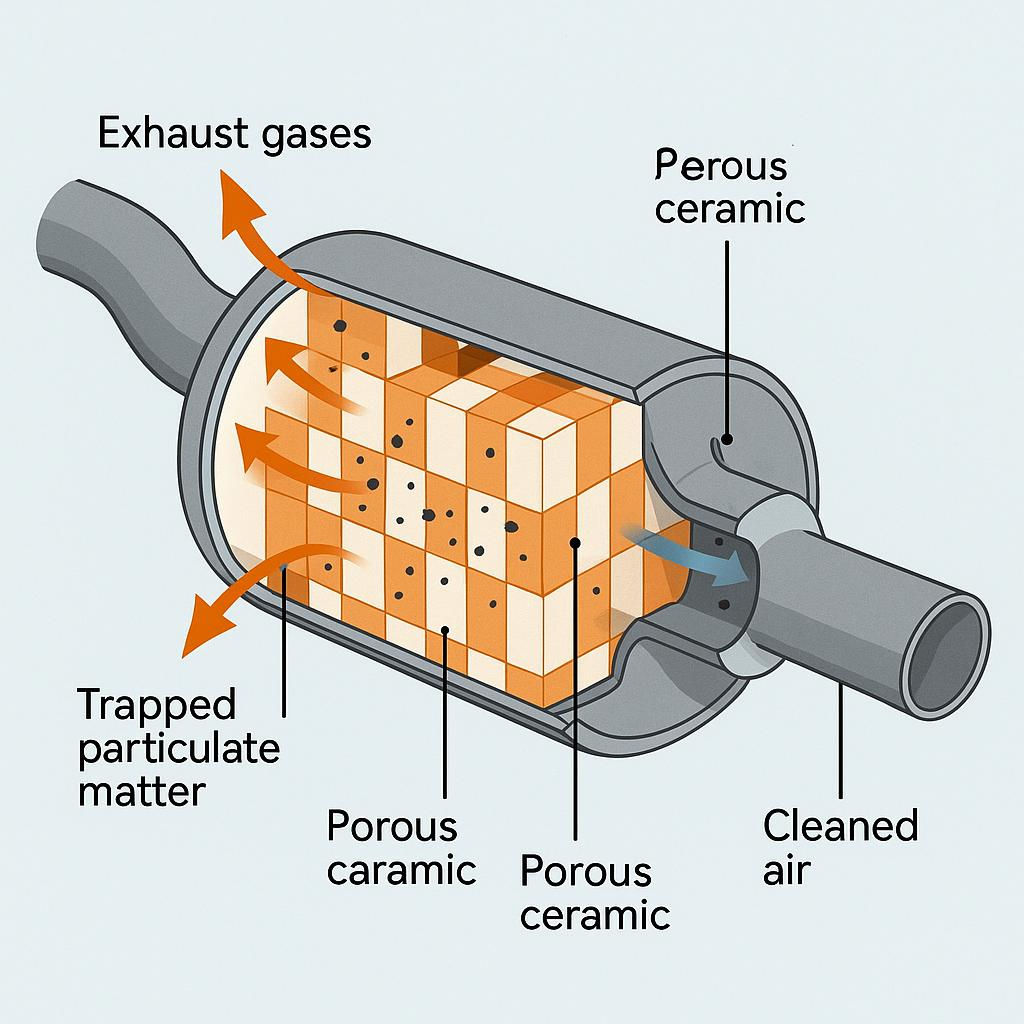
A Diesel Particulate Filter (DPF) removes soot particles from diesel exhaust before they leave the tailpipe.
Inside the housing is a ceramic honeycomb substrate that traps particulate matter while allowing exhaust gas to flow through.
As soot builds up, the engine performs regeneration to burn the soot into ash.
Because the internal ceramic is fragile, correct installation is critical.
Think of installation as three separate inspections.
Always confirm:
· OE cross-reference
· Engine model
· Emission year
· Chassis application
· Sensor locations
Even small application differences may prevent proper installation.
Before installation, check for:
· Shipping damage
· Cracked housing
· Loose mounting brackets
· Damaged sensor ports
· Bent flanges
Never install a damaged filter.
Replace wear items whenever possible.
Recommended replacement parts include:
· Underlined keyword: <u>DPF clamps</u>
· Underlined keyword: <u>DPF gaskets</u>
· Underlined keyword: <u>V-band clamps</u>
· Underlined keyword: <u>Temperature sensors</u> (if damaged)
· Underlined keyword: <u>Pressure sensor tubing</u>
Reusing worn hardware often leads to exhaust leaks.
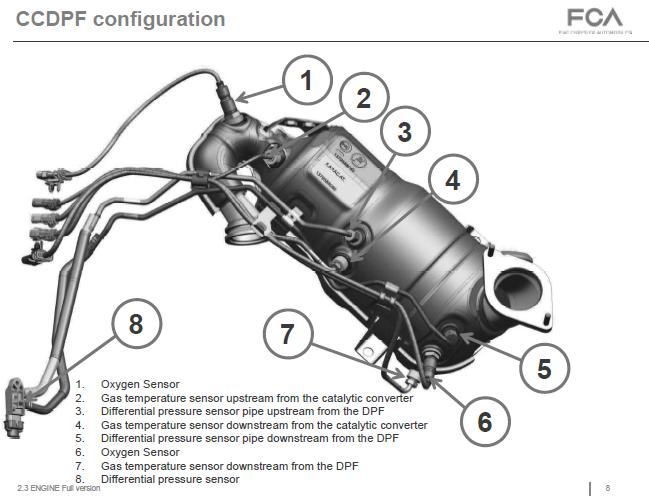
Allow the exhaust system to cool completely.
Disconnect:
· Temperature sensors
· Pressure lines
· NOx sensors (if equipped)
Support the DPF before removing mounting hardware.
Avoid dropping the unit.
The ceramic substrate can crack internally even if no external damage is visible.
Before installing the new filter, inspect:
· DOC outlet
· Exhaust piping
· Flexible joints
· Mounting brackets
· Exhaust hangers
A failed upstream component may damage the new DPF.
Never reuse crushed gaskets.
New sealing components ensure:
· Proper exhaust flow
· Correct regeneration temperatures
· No exhaust leakage
Leaks before the DPF reduce regeneration efficiency.
Leaks after the DPF may trigger emissions faults.
Install the filter in the correct flow direction.
Check:
· Flow arrow orientation
· Sensor port positions
· Mount alignment
· Clearance from surrounding components
Never force the DPF into position.
If mounting holes do not align, stop and verify fitment.
Follow manufacturer torque specifications.
Avoid:
· Uneven tightening
· Over-tightening
· Cross-threading
Proper clamping prevents vibration damage during thousands of miles of operation.
Reconnect:
· Temperature sensors
· Differential pressure lines
· NOx sensors
· DEF components (if removed)
Ensure wiring does not contact hot exhaust surfaces.
Before starting the engine, verify:
✅ All clamps tightened
✅ All sensors connected
✅ No loose brackets
✅ No tools left in engine compartment
✅ Pressure tubes secure
✅ Wiring routed correctly
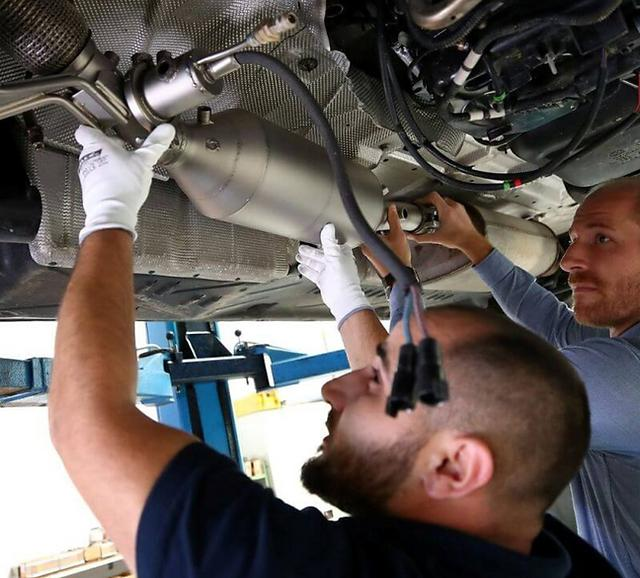
After installation:
Start the engine and inspect for:
· Exhaust leaks
· Unusual noises
· Vibration
· Warning lights
Monitor:
· Differential pressure
· Exhaust temperature
· Regeneration status
If abnormal readings appear, stop immediately and inspect the installation.
Mistake | Possible Result |
Wrong part number | Installation failure |
Reused gasket | Exhaust leak |
Incorrect torque | Loose connections |
Damaged pressure tube | False sensor readings |
Sensor installed incorrectly | DPF warning light |
Internal impact damage | Premature filter failure |
Skipping fitment verification | Product return |
Most warranty claims begin with installation errors rather than manufacturing defects.
Professional fleets often follow these practices:
· Verify OE numbers before shipping.
· Replace clamps and gaskets with every installation.
· Inspect sensors before reuse.
· Record differential pressure after installation.
· Perform a road test before returning the truck to service.
· Train technicians on regeneration procedures.
These simple steps reduce downtime and improve long-term DPF performance.
For aftermarket distributors, the installation process begins before the truck reaches the repair shop.
Accurate fitment reduces:
· Product returns
· Warranty claims
· Technician labor time
· Customer complaints
· Inventory confusion
Many leading suppliers perform pre-shipment fitment verification to confirm that each DPF matches the intended engine platform before delivery.
A Diesel Particulate Filter is a precision emissions component—not just another exhaust part.
Successful installation depends on:
· Correct part selection
· Careful handling
· New sealing hardware
· Proper sensor connections
· Final system inspection
For fleets and distributors, following a standardized installation process helps reduce downtime, improve emissions system reliability, and extend the service life of the DPF.


